Creating Pages
Pages are created using the Builder interface. Each page displays a single widget and can be configured with various settings to control its appearance and behavior.
Required Information
- Title: Display name for the page
- Widget Type: The type of widget to display (Flow, Report, Data Grid, Dashboard, etc.)
- Widget Item: The specific item to display (selected based on widget type)
Configuration Steps
1. Open Page Creation Dialog
Navigate to the Builder interface and click the "Add" button (or similar action) to open the page creation dialog.
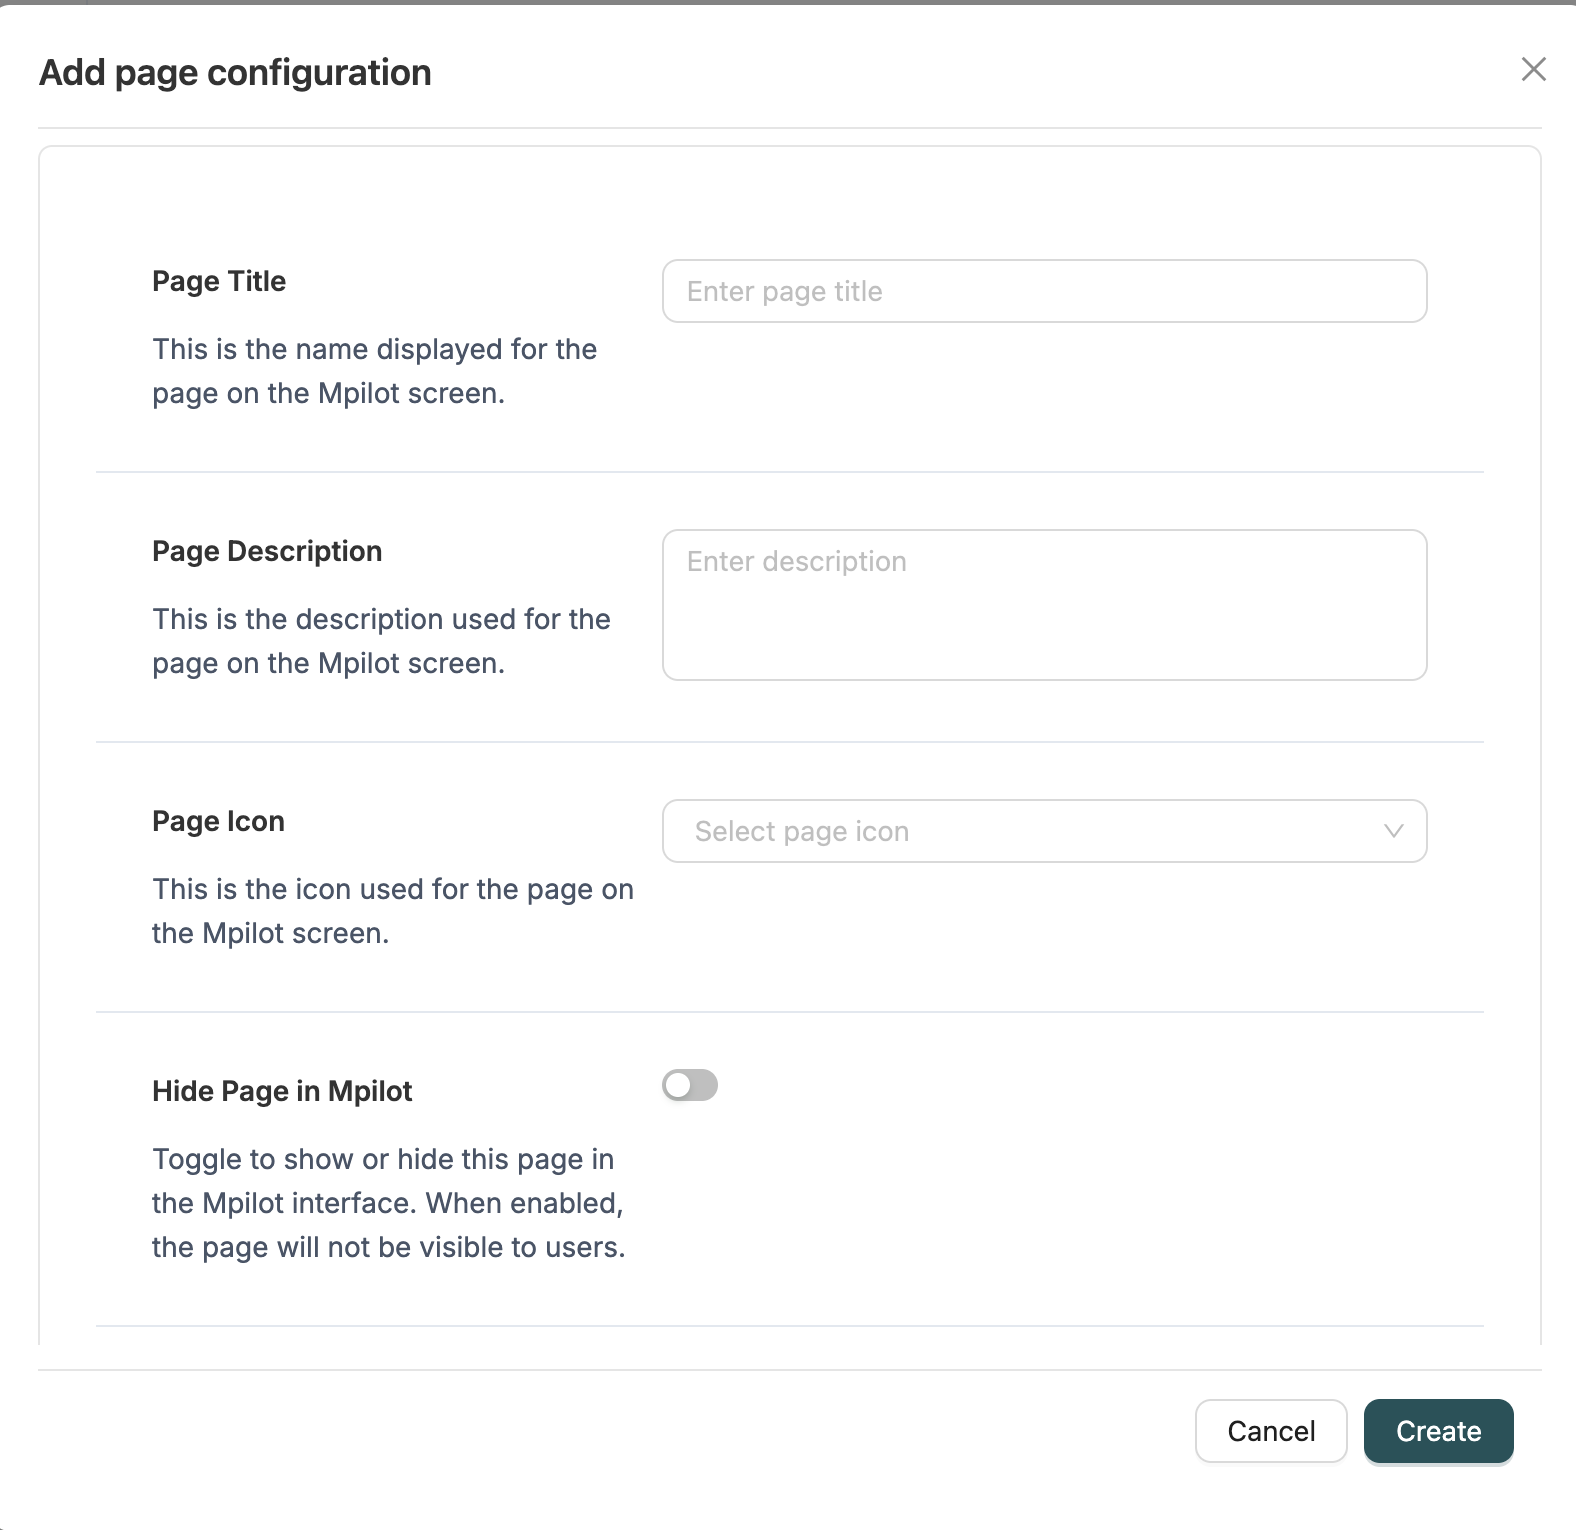
2. Enter Page Title
Provide a descriptive title for the page. This title will be displayed in the navigation and on the page itself.
Description: This is the name displayed for the page on the Mpilot screen.
3. Enter Page Description
Provide an optional description explaining the purpose or usage of the page.
Description: This is the description used for the page on the Mpilot screen.
4. Select Page Icon
Choose an icon to visually represent the page. Icons help users quickly identify pages in navigation.
Description: This is the icon used for the page on the Mpilot screen.
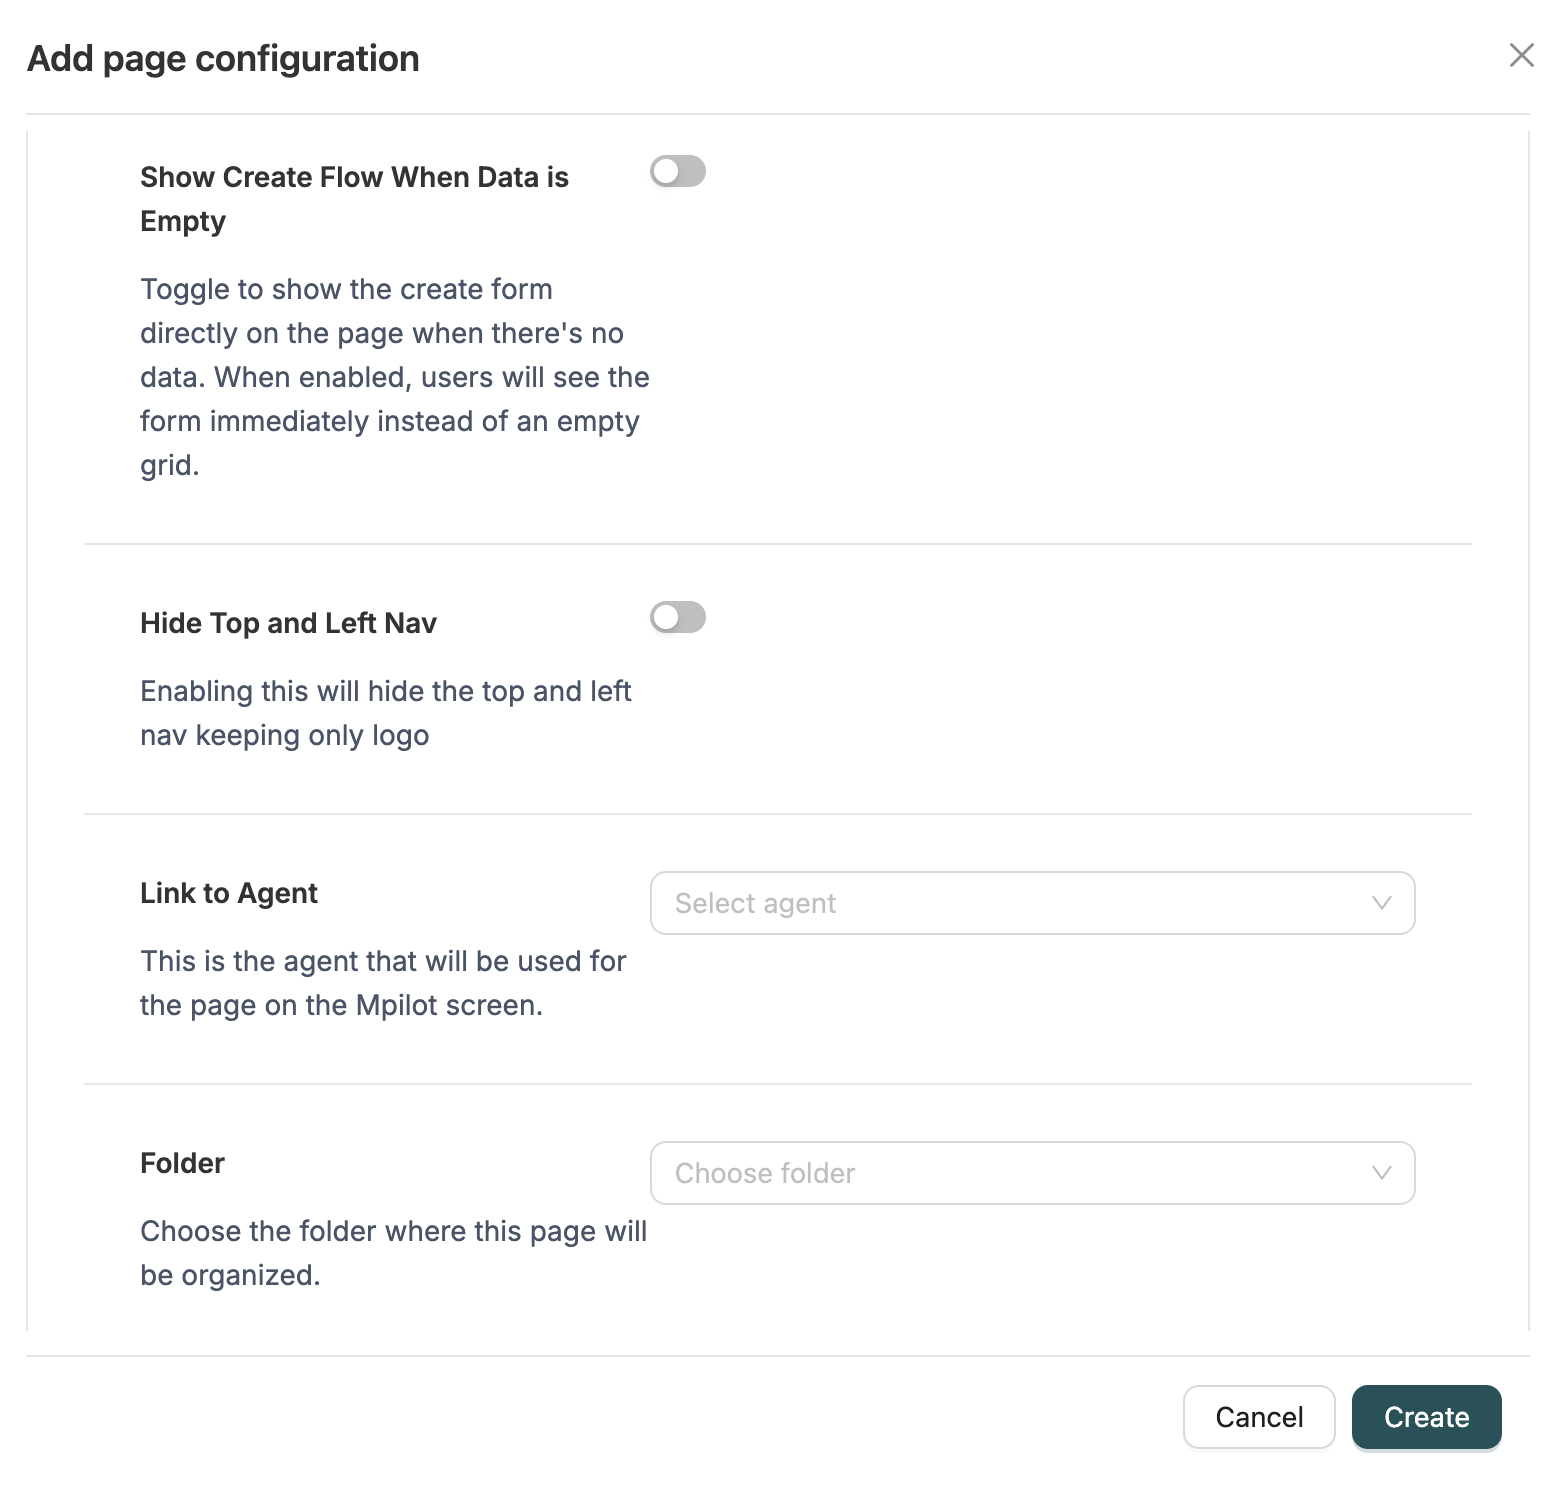
5. Configure Visibility Settings
Configure how the page appears in the interface:
Hide Page in Mpilot
Toggle to show or hide this page in the Mpilot interface. When enabled, the page will not be visible to users.
Show Create Flow When Data is Empty
Toggle to show the create form directly on the page when there's no data. When enabled, users will see the form immediately instead of an empty grid.
Use Case: Useful for pages with datagrids where you want users to be able to create records immediately.
Hide Top and Left Nav
Toggle to hide the top and left navigation, keeping only the logo. This provides a cleaner, more focused interface.
Use Case: Useful for pages that should be displayed in a standalone or embedded context.
6. Link to Agent (Optional)
Associate an AI agent with the page. When an agent is linked, it enables AI-powered features and conversational interfaces.
Description: This is the agent that will be used for the page on the Mpilot screen.
7. Select Folder (Optional)
Choose a folder to organize the page. Folders help organize pages for better management and navigation.
Description: Choose the folder where this page will be organized.
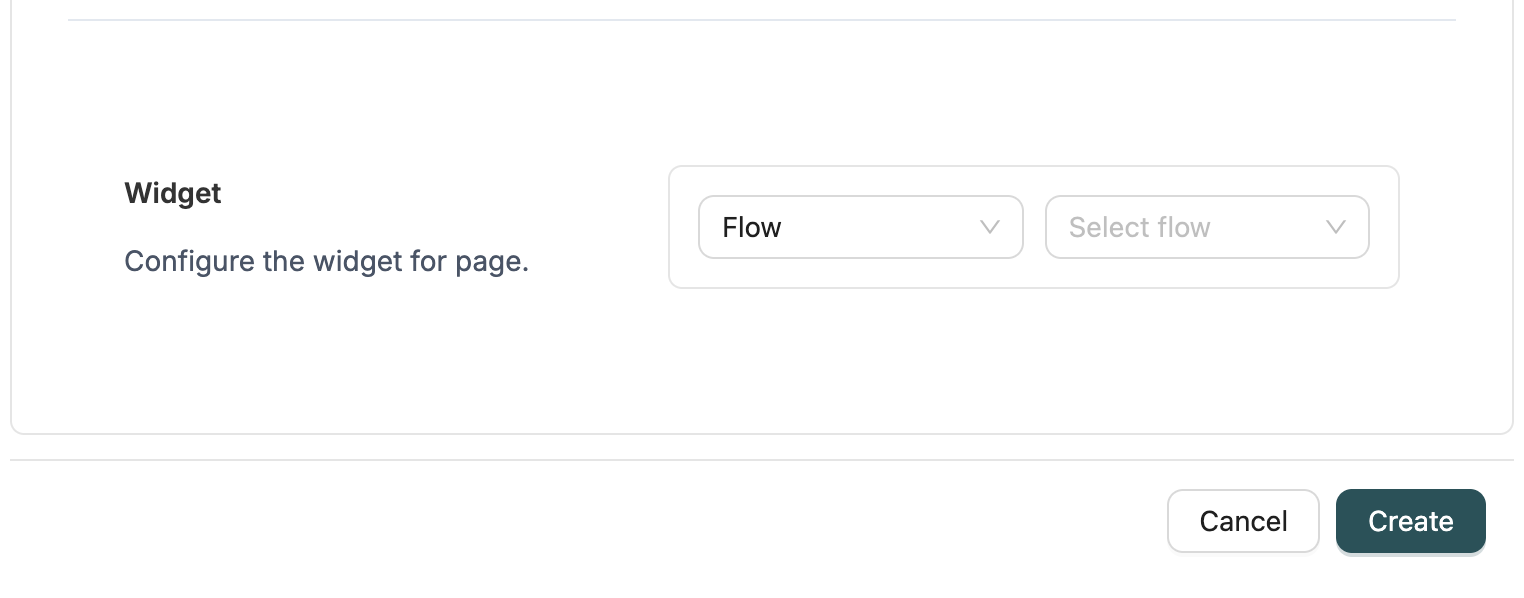
8. Configure Widget
Configure the widget that will be displayed on the page:
Select Widget Type
Choose the type of widget to display:
- Flow: Display a workflow interface
- Report: Display a report
- Data Grid: Display a datagrid for viewing Object records
- Dashboard: Display a dashboard with multiple components
- Estimator: Display an estimator layout for price calculations
- Standard Components: Display standard system components (Price Estimator, Day Ops, Audit Trail)
- View360: Display a View360 layout for comprehensive record views
- Flow Chain: Display a flow chain execution interface
- Link: Display an external link or URL
Select Widget Item
Based on the selected widget type, choose the specific item to display:
- For Flow: Select a workflow
- For Report: Select a report
- For Data Grid: Select a datagrid
- For Dashboard: Select a dashboard
- For Estimator: Select a workflow used for estimation
- For Standard Components: Select from available standard components
- For View360: Select a View360 layout
- For Flow Chain: Select a flow chain
- For Link: Enter a URL (e.g.,
https://example.com)
9. Save Page
Click the "Save" button to create the page. After saving:
- The page is created and appears in the Builder page list
- The page can be accessed from the Mpilot interface (if not hidden)
- The page can be edited, cloned, or deleted as needed
Editing Existing Pages
To edit an existing page:
- Navigate to the Builder interface
- Find the page in the page list
- Click the "Edit" icon next to the page
- The page creation dialog will open with existing configuration
- Make your desired changes
- Click "Save" to apply updates
Cloning Pages
To clone an existing page:
- Navigate to the Builder interface
- Find the page in the page list
- Click the "Clone" icon next to the page
- A new page will be created with the same configuration
- Edit the cloned page as needed
Reordering Folders and Pages
Reordering Folders
You can reorder folders in the Builder sidebar to organize your page structure:
- Navigate to the Builder interface
- Click the reorder icon (ArrowUpDown) in the sidebar header to enable bulk edit mode
- Drag and drop folders in the sidebar tree to reorder them
- Folders can be moved within the same level or to different parent folders
- Click the check icon (✓) to save your changes
- Click the X icon to cancel and revert to the original order
Note: The "All Pages" and "Uncategorized" folders cannot be reordered and will remain at the top of the tree.
Reordering Pages
Pages are displayed in a grid format and can be filtered by folder. To change the order of pages:
- Within a Folder: Pages within a folder are displayed in the order they were created or last modified
- Move Between Folders: Change a page's folder by editing the page and selecting a different folder
Best Practices
Naming Conventions
- Use descriptive titles that clearly indicate the page's purpose
- Include context in the title (e.g., "Customer Orders Dashboard" instead of "Dashboard")
- Use consistent naming patterns across related pages
Widget Selection
- Choose widget types that match your use case
- Ensure the selected widget item exists and is properly configured
- Test widget functionality after page creation
Organization
- Use folders to organize related pages together
- Group pages by functional area or user role
- Keep folder structures simple and intuitive
Visibility Settings
- Use "Hide Page" for pages that should only be accessed programmatically
- Enable "Show Create Flow" for pages where users frequently create new records
- Use "Hide Top and Left Nav" for embedded or standalone page contexts
AI Agent Integration
- Link agents to pages that benefit from AI assistance
- Choose agents that match the page's purpose and content
- Test agent functionality after linking
Related Introduction
- Builder Introduction - Overview of Builder and pages
- Workflows Introduction - Learn about workflows used as page widgets
- Datagrids Introduction - Understand datagrids used as page widgets
- Layouts Introduction - Learn about layouts used as page widgets